 Last week I wrote about running OpenShift 4 on your laptop. This is using CodeReady Containers (CRC) and deploys a full Red Hat OpenShift into a single VM on a workstation.
You can install OpenShift Service Mesh which is Red Hat’s version of Istio into CRC. This is done using Operators and in this blog I want to write about my experience.
Please note: an unmodified CRC installation reserves 8 GB of memory (RAM) for the virtual machine running OpenShift. This is not enough to run Istio/Service Mesh. I am in the fortunate situation that my notebook has 32 GB of RAM, so in the article about CRC I have set the memory limit of CRC to 16 GB with this command:
$ crc config set memory 16384
You need to do that before you start CRC for the first time.
Install the Service Mesh Operators
Here are the official instructions I followed. OpenShift uses an Operator to install the Red Hat Service Mesh. There are also separate Operators for Elasticsearch, Jaeger, and Kiali. We need all 4 and install them in sequence.
In the Web Console, go to Catalog, OperatorHub and search for Elasticsearch:
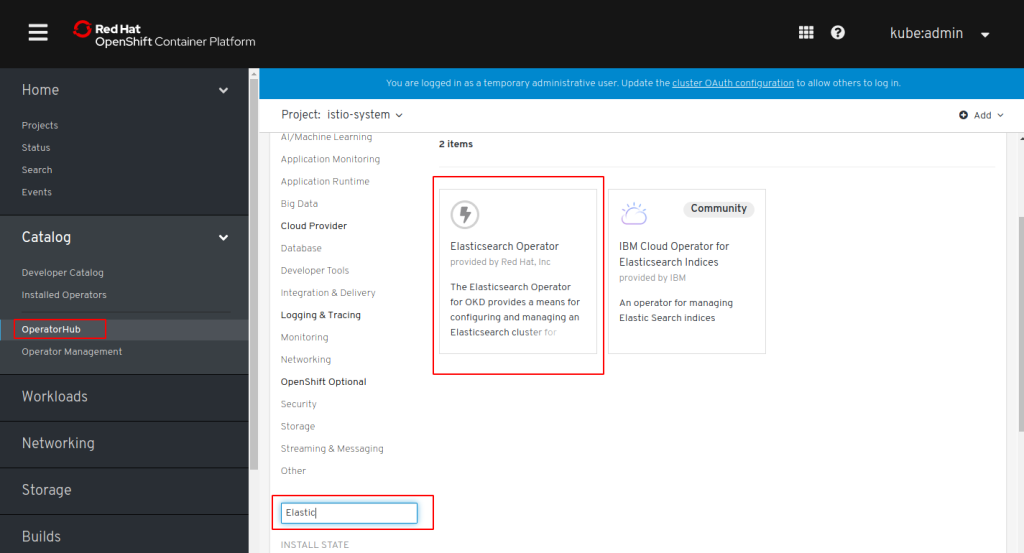
Click on the Elasticsearch (provided by Red Hat, Inc.) tile, click “Install”, accept all defaults for “Create Operator Subscription”, and click “Subscribe”.
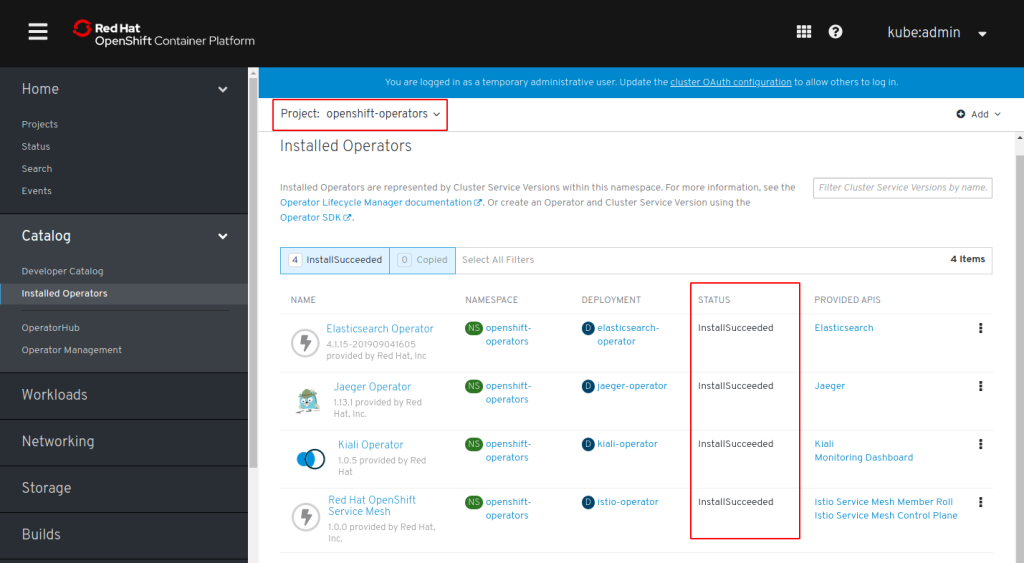
In the “Subscription Overview” wait for “UPGRADE STATUS” to be “Up to date”, then check section “Installed Operators” for “STATUS: InstallSucceeded”:

Repeat these steps for Jaeger, Kiali, and Service Mesh. There are Community and Red Hat provided Operators, make sure to use the Red Hat provided ones!
I don’t know if this is really necessary but I always wait for the Operator status to be InstallSucceeded before continuing with the next one.
In the end there will be 4 Operators in Project “openshift-operators”:
Create the Service Mesh Control Plane
The Service Mesh Control Plane is the actual installation of all Istio components into OpenShift.
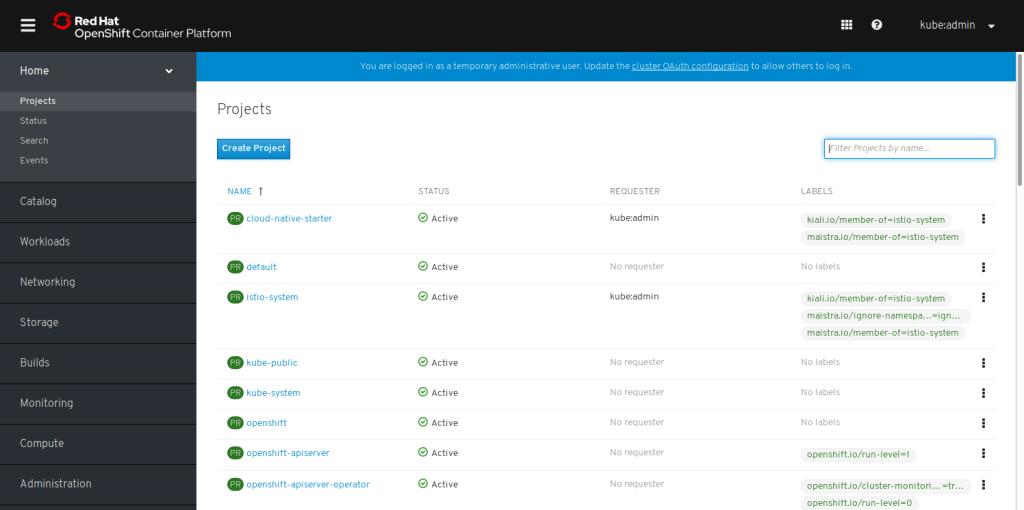
We begin with creating a project ‘istio-system’, either in the Web Console or via command line (‘oc new-project istio-system‘) You can actually name the project whatever you like, in fact you can have more than one service mesh in a single OpenShift instance. But to be consistent with Istio I like to stay with ‘istio-system’ as name.
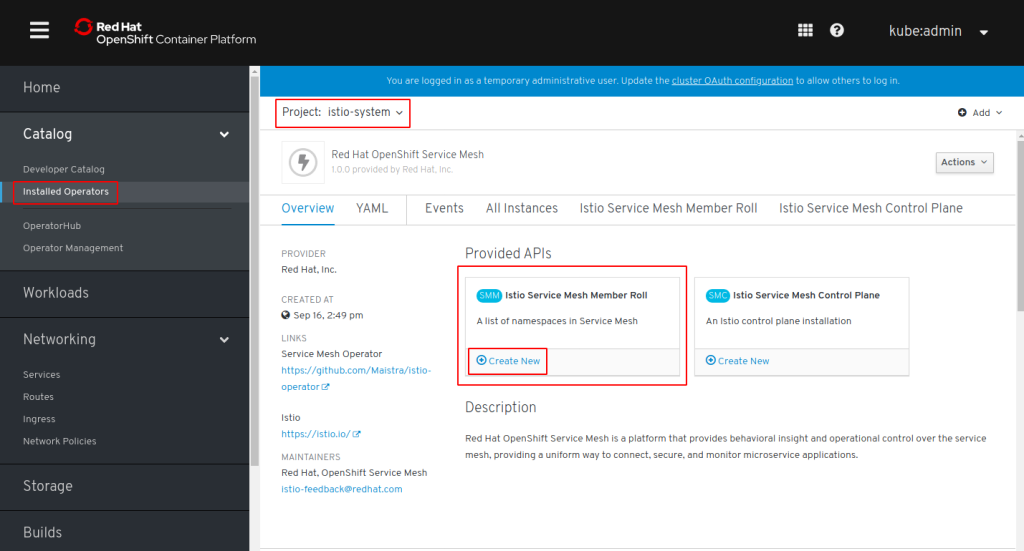
In the Web Console in project: ‘istio-system’ click on “Installed Operators”. You should see all 4 Operators in status “Copied”. The Operators are installed in project ‘openshift-operators’ but we will create the Control Plane in ‘istio-system’. Click on “Red Hat OpenShift Service Mesh”. This Operator provides 2 APIs: ‘Member Role’ and ‘Control Plane’:

Click on “Create New” Control Plane. This opens an editor with a YAML file of kind “ServiceMeshControlPlane”. Look at it but accept it as is. It will create a Control Plane of name ‘basic-install’ with Kiali, Grafana, and Tracing (Jaeger) enabled, Jaeger will use an ‘all-in-one’ template (without Elasticsearch). Click “Create”.
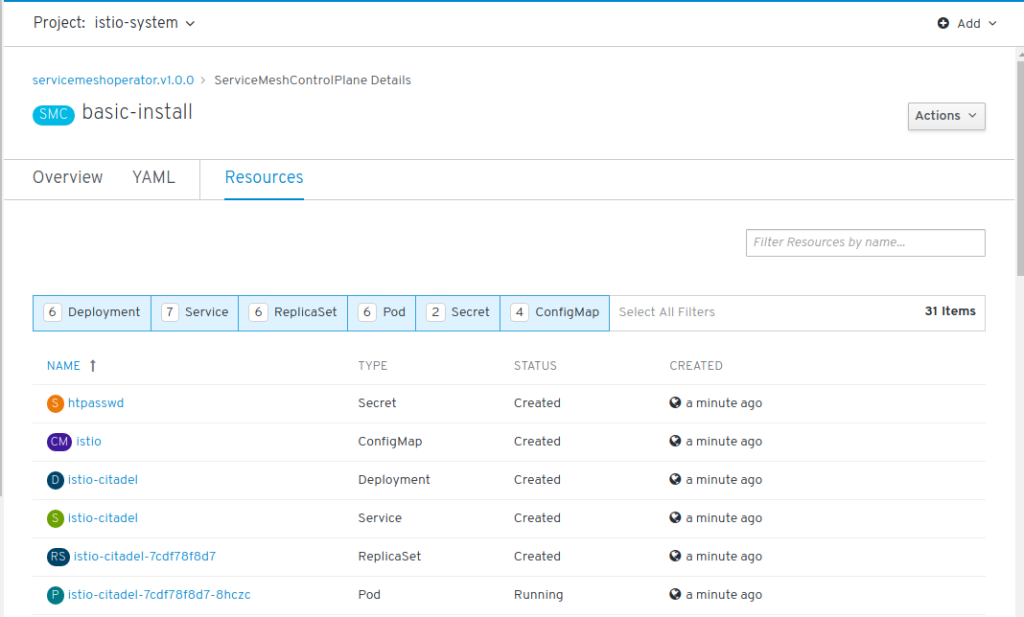
You will now see “basic-install” in the list of Service Mesh Control Planes. Click on “basic-install” and “Resources”. This will display a list of objects that belong to the control plane and this list will grow in the next minutes as more objects are created:
A good way to check if the installation is complete is by looking into Networking – Routes. You should see 5 routes:

Click on the Routes for grafana, jaeger, prometheus, and kiali. Accept the security settings. I click on Kiali last because Kiali is using the other services and in that way all the security settings for those are in place already.
One last thing to do: you need to specify which projects are managed by your Service Mesh Control Plane and this is done by creating a Service Mesh Member Role.
In your project ‘istio-system’ go to “Installed Operator” and click on the “OpenShift Service Mesh” operator. In the Overview, create a new ‘Member Roll’:
In the YAML file make sure that namespace is indeed ‘istio-system’ and then add all projects to the ‘members’ section that you want to be managed.
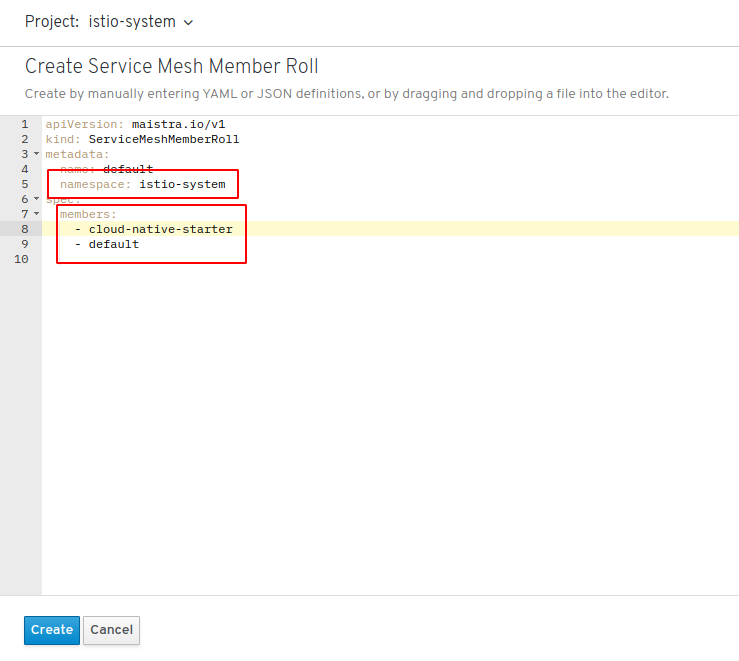
Good to know: These projects do not need to exist at this time (in fact we are going to create ‘cloud-native-starter’ in a moment) and you can always change this list at any time!
Click “Create”. You are now ready to deploy an application.
Example Application
As an example I use one part of our OpenShift on IBM Cloud Workshop.
First step is to create a build config and a build which results in a container image being built and stored in the OpenShift internal image registry:
$ oc new-build --name authors --binary --strategy docker
$ oc start-build authors --from-dir=.
The instructions in the workshop to check for the image (part 1, step 3) no longer work, OpenShift 4 doesn’t use a Docker registry anymore and the new registry doesn’t have a UI. Check the build logs and wait until the image has been pushed successfully.
Before deploying the application, we need to change the deployment.yaml file in the deployment directory:
OpenShift Service Mesh uses an annotation in the Kubernetes Deployment definition to trigger the Istio Proxy or Sidecar injection into a pod. The tagging of a namespace that you may use on default Istio doesn’t work on OpenShift. With the “OpenShift way” you have control over which pods receive a sidecar and hence are part of the service mesh; build containers for example shouldn’t use a sidecar.
The annotation is ‘sidecar.istio.io/inject: “true” ‘ and the YAML file looks like this:
kind: Deployment
apiVersion: apps/v1beta1
metadata:
  name: authors
spec:
  replicas: 1
  template:
    metadata:
      annotations:
        sidecar.istio.io/inject: "true"
      labels:
        app: authors
        version: v1
You also need to change the location of the image in the deployment.yaml. The registry service has changed between OpenShift 3.11 – on which the workshop is based – and OpenShift 4 in this article:
    spec:
      containers:
      - name: authors
        image: image-registry.openshift-image-registry.svc:5000/cloud-native-starter/authors:latest
Once these changes are made to deployment.yaml, start the deployment (you must be in the deployment directory) and create a Route:
$ oc apply -f deployment.yaml
$ oc apply -f service.yaml
$ oc expose svc/authors
The second command creates the service for the deployment. Note: Without a service in place, the sidecar container will not start! If you check the istio-proxy log it will constantly show that it can’t find a listener for port 3000. That is the missing service definition, the error looks like this:

You can try if the example works by calling the API, e.g.:
curl -X GET "http://authors-cloud-native-starter.apps-crc.testing/api/v1/getauthor?name=Niklas%20Heidloff" -H "accept: application/json"
This will return a JSON object with author information.
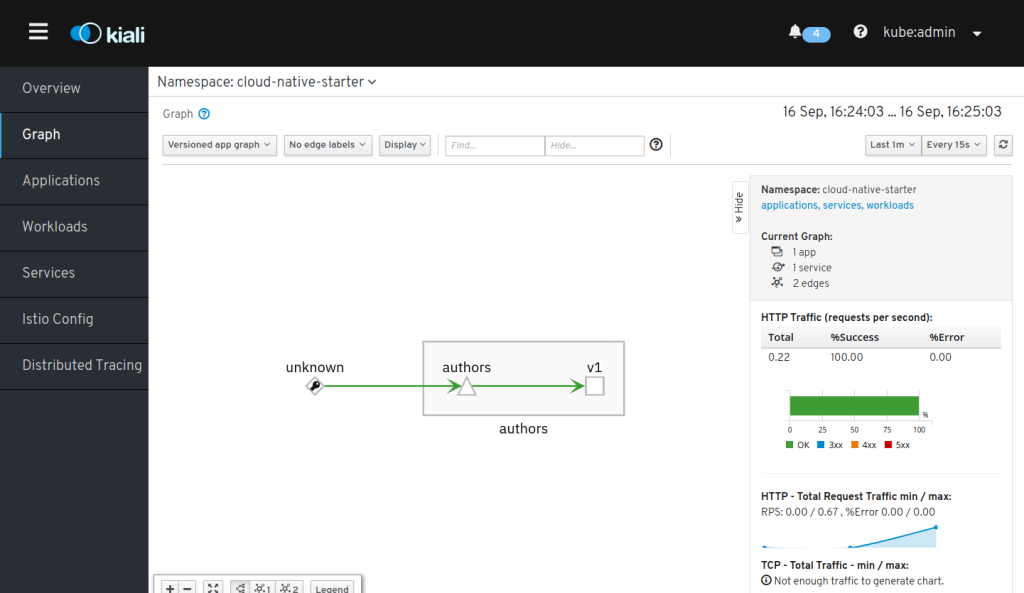
You can check if it works by “curl-ing” the address a couple of times and checking the result in Kiali (https://kiali-istio-system.apps-crc.testing):